Fix Windows Printer Error 0x00000520 (6 Method Guide)
Chris
Issue:How Can I Fix Printer Error 0x00000520 on Windows?
Hi. I got y new laptop and I wanted to connect it with my shared printers. I already tried selecting a printer by name but it didn't work. “Windows cannot connect to the printer – error: 0x00000520” message appears on my screen. Any suggestions on how to fix this?
Windows is known to be a complicated system that depends on thousands of background processes to work well. Through Windows, computer users are able to connect different devices such as keyboards, printers, mouses, and more to their PC. But despite its effectiveness, there are still errors and issues that exist out of nowhere.
And with that being said, users just discovered the “Windows cannot connect to the printer” error, also known as – error: 0x00000520. This error code indicates that the login session was terminated or not found so the close reason for this issue is the network.
Since printers are essential to most computer tasks especially for offices, errors like this can still cause a lot of hassle. We understand that it is very annoying when you cannot do your job well because of such errors. There are times when even the IT team cannot fix the issue so printing issues such as 0x0000007c, 0x0000011b, and 0x000007d1 can cause stress for some people.
Things That You Need to Do First
And before you proceed with the step-by-step method of fixing the printing issue, we recommend you check if the printer drivers are compatible with your computer, if the new device has permissions enabled on the printer, and before you proceed with the step-by-step process, we suggest you check if the new device has permissions on the printer and if the printer drivers are compatible with your machine. You should also check the PC’s network connection with the printer first before trying the step-by-step method. Once you tried doing all of these and the error 0x00000520 still shows up in Windows, you can also try using iolo System Mechanic for a hassle-free troubleshooting procedure.
But if you still want to do it yourself, you can follow the instructions listed below:
Method #1. Fix the Issue by Checking the Network Settings
- Launch Windows Settings using Windows key + I key.
- Click on Network and Internet on the left-hand side, if you are using Windows 11. And if you are using Windows 10, you should click the Network and Internet option.
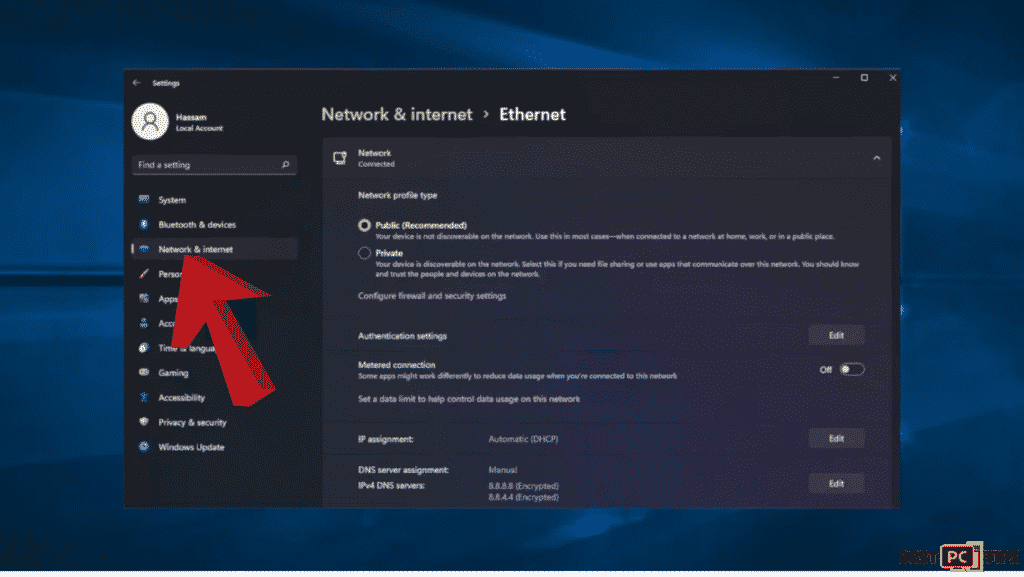
- Then make your way to Ethernet settings and check your Public and Private network settings
- After doing that, recheck if the issue still occurs.
Method #2. Try to Install Available Updates
Updating your system will help you get the latest security improvements and fixes so that your device can stay protected and run smoothly.
- In the Windows search bar type Updates in Windows and hit Enter.
- Then click Check for updates on the right side of the window
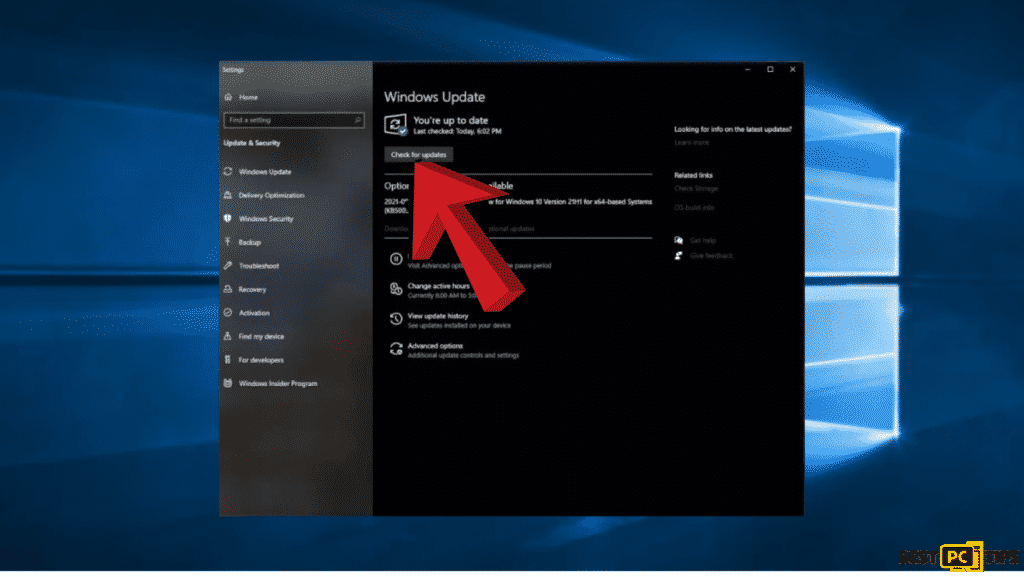
- After that, install all the optional updates as well.
- Then restart your PC.
Method #3. Run Your Printer Troubleshooter
- Launch the Settings app using Windows + I key.
- Choose Update & Security > Troubleshoot.
- Click Additional troubleshooters.
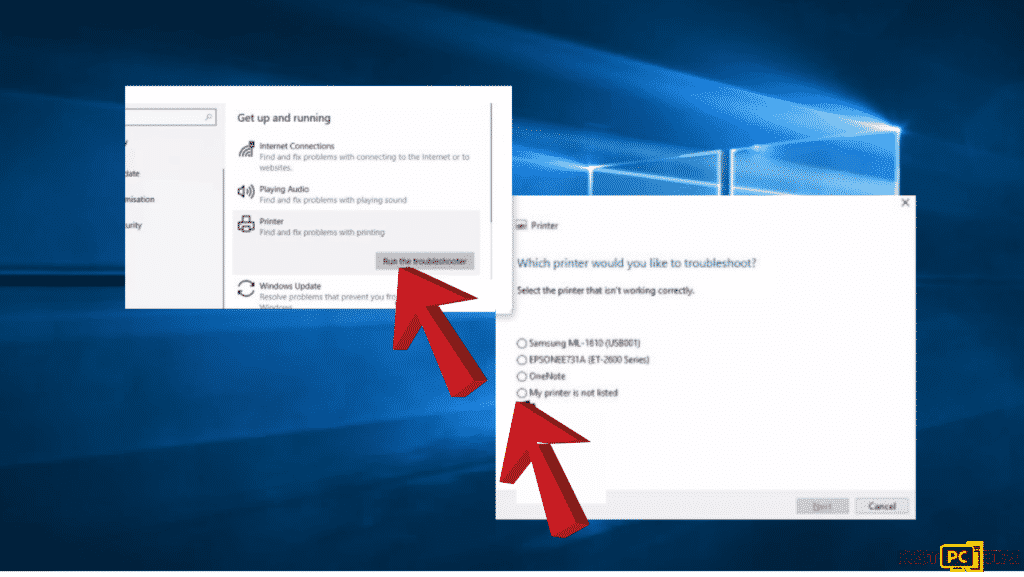
- Select Printer and hit Run the troubleshooter.
- Wait for a minute until your system automatically detects and fixes the problem.
Method #4. Update Your Printer Drivers
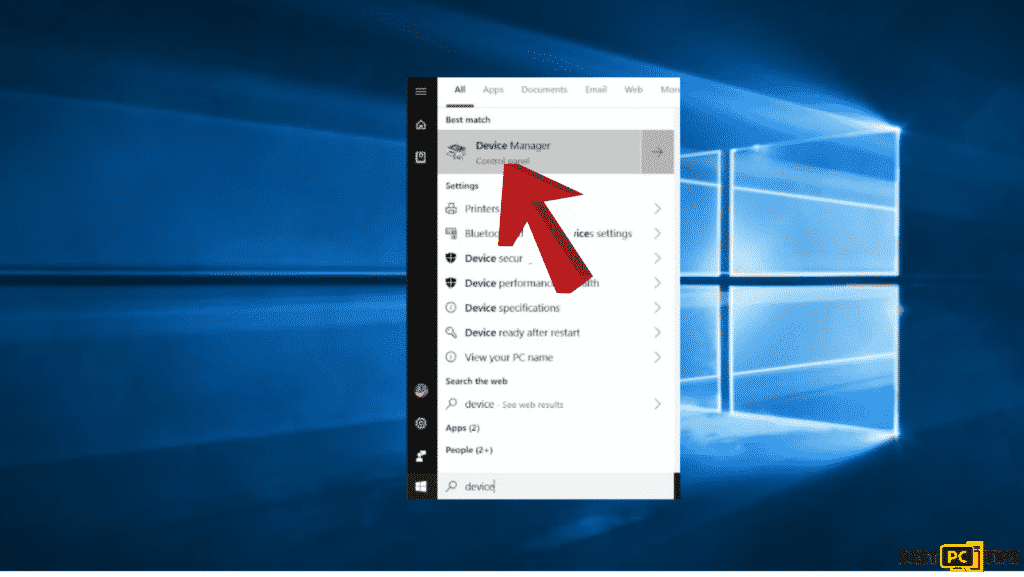
- Hit the Windows key and type Device Manager into the search bar.
- Then select Device Manager.
- Search for the printer device
- Hover over the device driver name and then right-click on it, then select Update Driver Software.
- Click the Search automatically for updated driver software option.
- After that, the system should automatically scan for available drivers.
- Lastly, restart Windows to finish the installation.
Method #5. Restart Print Spooler Service
- Hit Windows +R to launch the Run box.
- Put services.msc and press OK.
- Navigate down and look for the print spooler service.
- Right-click on the print spooler.
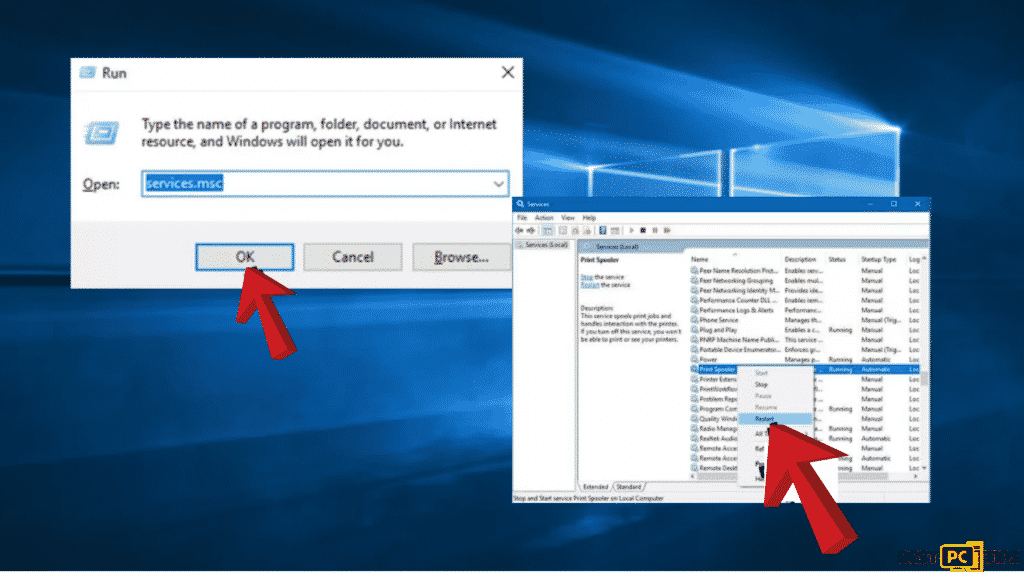
- Select Restart once the menu appears.
- If the service is not started, you can right-click on print spooler select properties.
- Switch the startup type to automatic.
- Select start the service located under the status.
- Click ok then apply to save changes.
- Lastly, connect the printer..
Method #6. Create a New Local Port
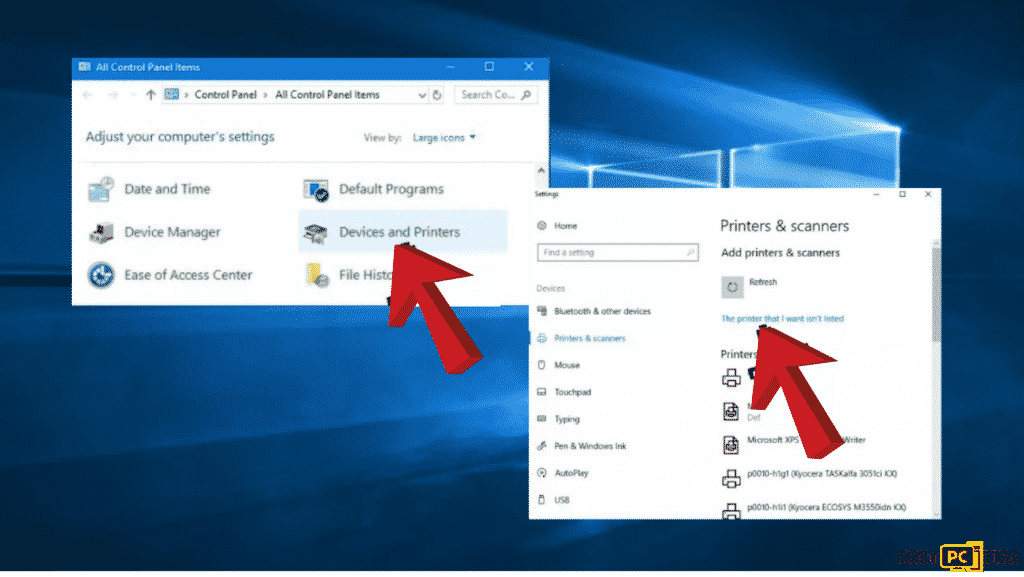
- Open Control Panel.
- Select Devices and Printers.
- Click Add a printer from the top menu.
- If you don’t see your printer from the list, click the link which says The printer that I want isn’t listed.
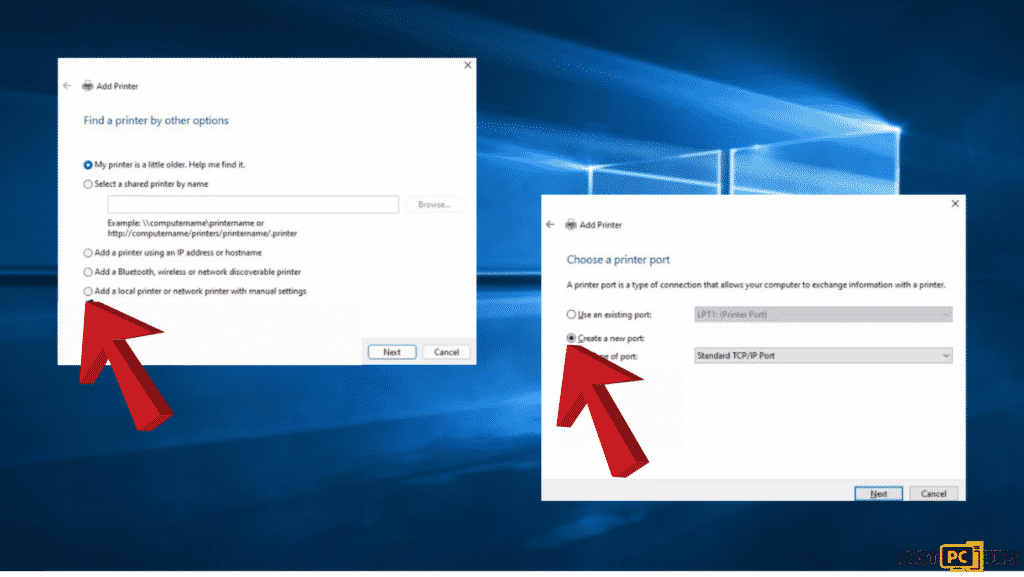
- Select Add a local printer or network printer with manual settings and click Next
- Select Create a new port
- Select Standard TCP / IP Port From the drop-down and click Next
- Put the printer’s address in the Printers port name field in the following format:
\\\\IP address or the Computer Name\\Printers Name
- Then select OK and hit Next.
- Search for your printer model from the directory and install drivers.
- Choose Next.
- If you have a disk, insert your disk, click Have Disk and browse to the driver’s location in the disk.
- Name your new printer.
- Hit Next.
- You can print a test page.
- Select Finish.
Final Words
Printing issues can cause a lot of stress and hassle at work so we recommend fixing the 0x00000520 error it as soon as you can to avoid delays and other more issues that might happen.
If you want to automatically scan and repair the issues of your computer, we recommend downloading iolo System Mechanic.
Offer
iolo System Mechanic® — is a patented PC & MAC repair tool & the only program of its kind. Not only it’s a registry fix, PC optimizer, or an anti-virus/malware remover – The iolo System Mechanic® technology reverses the damage done to Windows or Mac, eliminating the need for time-consuming reinstallations & costly technician bills.
It is available for FREE. Although, for some more advanced features & 100% effective fixes you may need to purchase a full license.
If the Printer Error 0x00000520 is still not fixed — don’t hesitate and contact us via email, or a Facebook messenger (the blue ‘bubble’ on the bottom-right of your screen).
